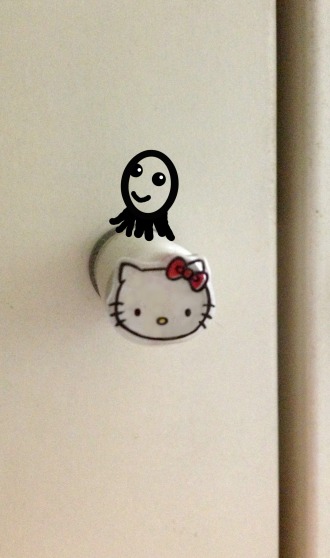
hello everybody (: it’s such a pleasure to see you here again.
backstory: my mother has a white Ikea cupboard. it looks plain. she has a Hello Kitty obsession. i like to draw stuff.
 so what do i do when i’m bored at home and decide i want to surprise her? stick little kitties onto the door knobs of course. she got me a pack of Shrinky Dinks (which i treasure) while she was holidaying in the States. they are the perfect material for making small, durable things. everyone should have Shrinky Dinks and permanent markers. i cannot find them here in Malaysia! the government should subsidize these kinds of things. not so much sugar. i like Shrinky Dinks more than diabetes.
i didn’t mean for that to sound offensive. it does, i think. somewhat. anyway, here’s the process, just for you. (:
materials:
Shrinky Dinks suitable for your project (clear/frosted/printable)
permanent markers of your choice
aluminium foil
scrap paper and pencil
1. check to see how large the surface you want to applique is. Shrinky Dinks will shrink to about 1/3 their original size. measure if you need to (multiply the length of the surface you want to applique by 3). this gives you a good estimate as to the length of unbaked Shrinky Dink. if you need to be even more precise, make a Shrinky Dink ruler! then draw your desired applique onto scrap paper, then trace it onto the plastic with a permanent marker.
2. on the flip side of the plastic where you drew the outline, add colours if desired (notice the kitties in the picture have flipped in step 2?). this is so that you don’t have to worry about smudging the colours with the outline. permanent markers have that annoying tendency. they love mingling and being sociable.
3. cut out the shape as neatly as possible, and round off any corners because they will come out super sharp! then, fold a piece of sturdy aluminium foil to make a small tray for your Shrinky Dinks to bake on. preheat your toaster oven (adjust it to a medium temperature if you can), and then place your tray with your creations in it (coloured side up) into the oven to shrink.
once it goes into the oven you will be entertained with a magical shrinking process that starts about 8 seconds after you place it into the oven. if this is your first time you may panic due to the sheer wonder and sudden-ness of it all, like i did. after about 2 minutes, when the Shrinky Dink lies there on the aluminium foil, shrunken, adorable and flat, take it out of the oven, or else it will form little bubbles under its surface as punishment for you leaving it to be scorched in the fires of toaster oven hell.
so if you were successful (my fingers are crossed that you will be!), you now have door knob appliques to be super proud of. stick them onto the door knobs with superglue and you’re done!
tips:
1. clear Shrinky Dinks may have marks when you stick them onto something with superglue. you might want to use frosted Shrinky Dinks on darker door knobs to help your design stand out too. they are slightly whitish when they shrink.
2. if your Shrinky Dinks don’t lay flat after they bake, cool them and then put them into the toaster oven again. while they’re hot, use chopsticks to press them down to flatten.
Hello Kitty is a trademark of Sanrio. please don’t sue me.
thank you for reading! happy crafting and tea-slurping (:
*slurps

